Firebase email and password authentication for Android
Firebase email and password authentication can be used to enable users of your Android app register/login on your app using the old-fashioned email and password style without you worrying much about building a backend to support the user authentication process.
Update October 2023
This post was originally created in early 2019 and uses Java and a now very old version of Android Studio for the example app. I’ve decided to update the post to include Android Studio Giraffe | 2022.3.1 and the new Jetpack Compose UI kit. I’ll still be keeping the legacy content and I’m only adding the new examples side-by-side with the old one.
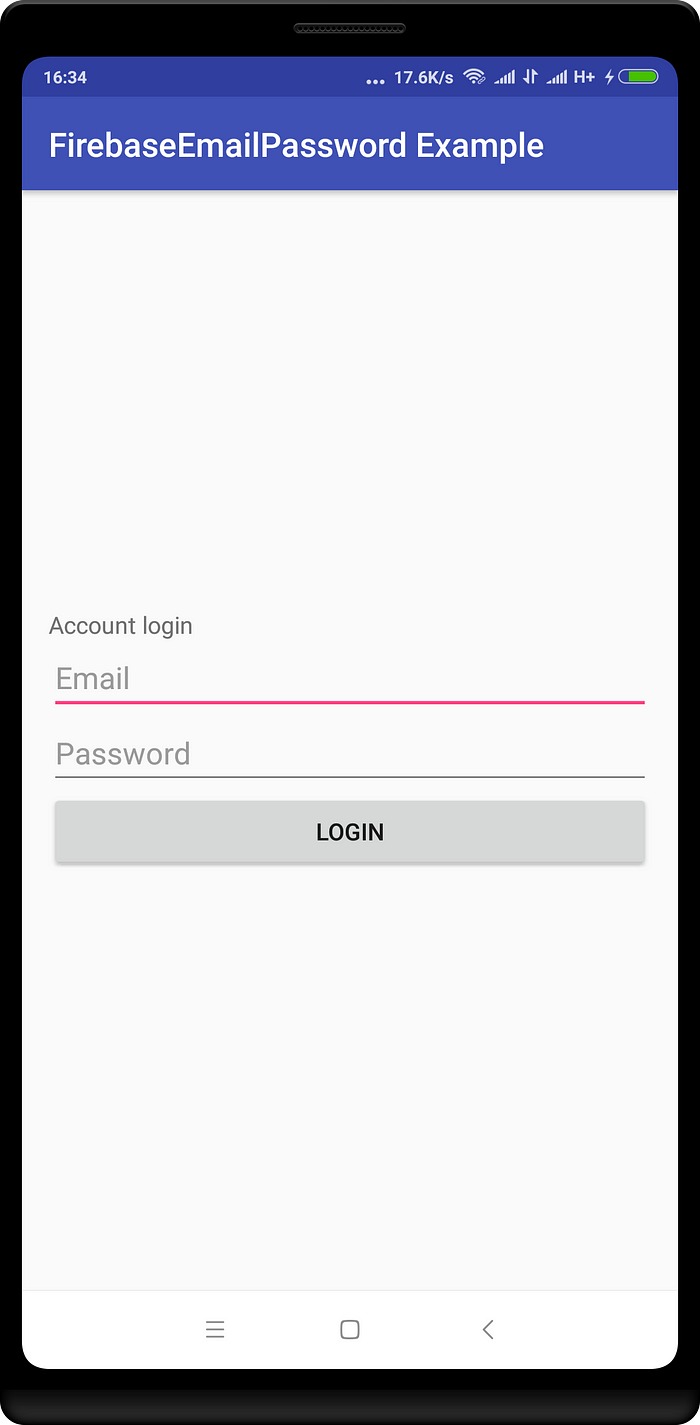
Step 1: Create New Android Studio Project
To get started, create a new project on Android Studio or open an existing project you intend to add email/password authentication to.
NB. If you’re using Android Studio Giraffe | 2022.3.1 or later and Jetpack Compose, create a new Project with an Empty Compose Activity.
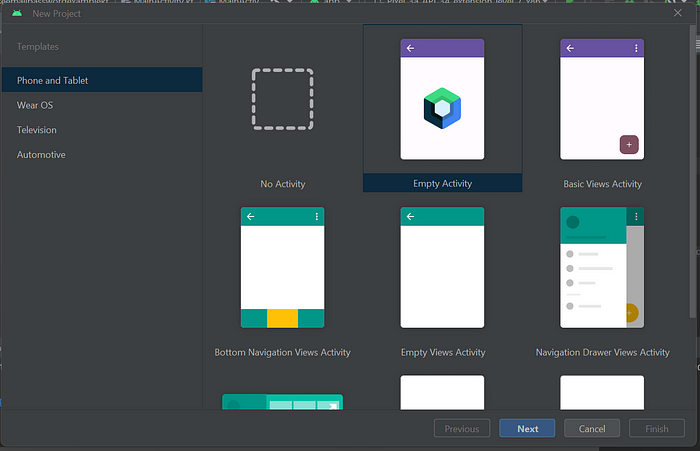
Step 2: Connect Your App to a Firebase Project
Click on Tool from the Android Studio menu bar then select Firebase.

The Firebase Assistant wizard window will open and display a list of Firebase services. Select Authentication from the list and follow the wizard to connect your app to Firebase (this requires an internet connection).
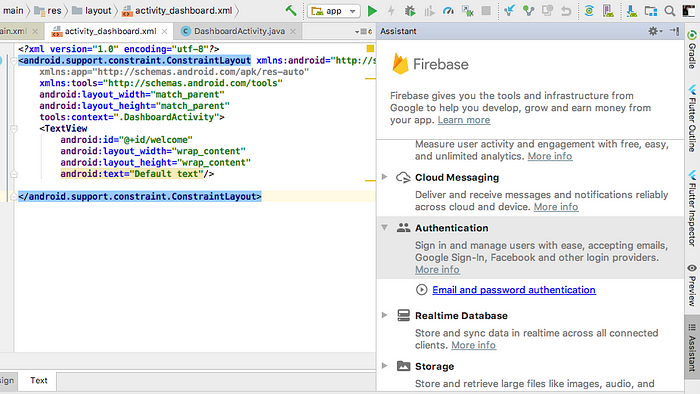
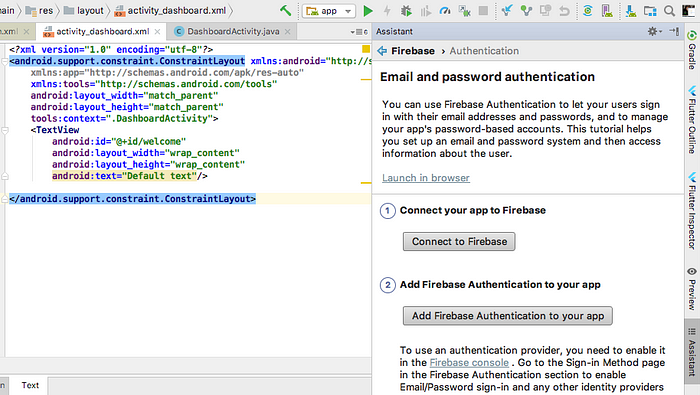
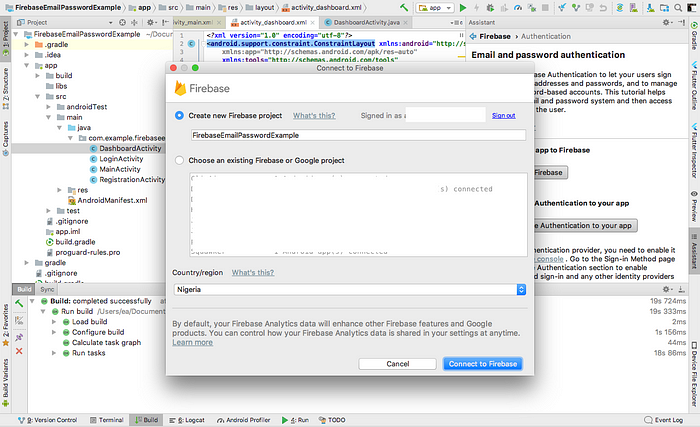
NB: For Giraffe | 2022.3.1 or later, you will not be able to follow the steps in the above screenshot. Follow the below instructions instead:
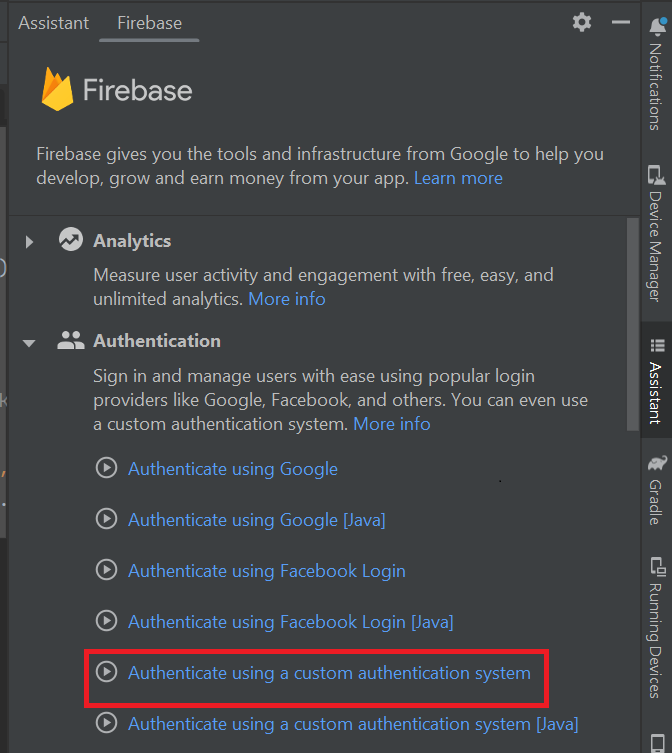
Next, click Connect to Firebase under the Authenticate using a custom authentication system option.
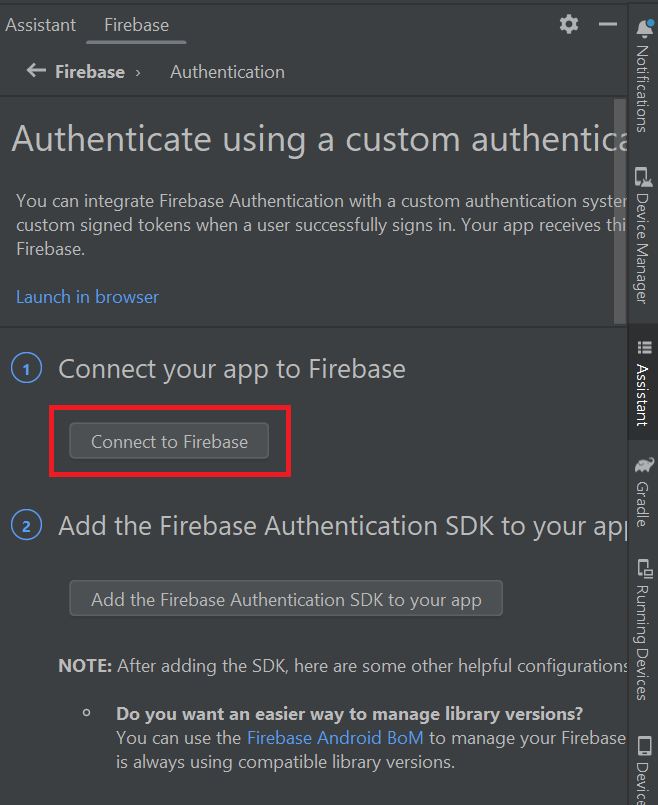
This will redirect you to the Firebase Console on a web browser. In the console, Select a Firebase project to connect to, or create a new Firebase project.
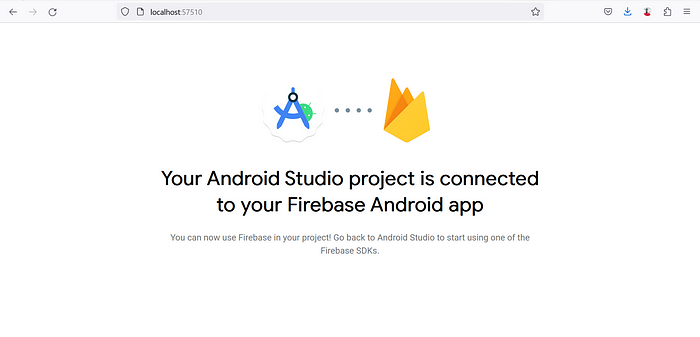
After selecting the project, click on Connect to finish the step.
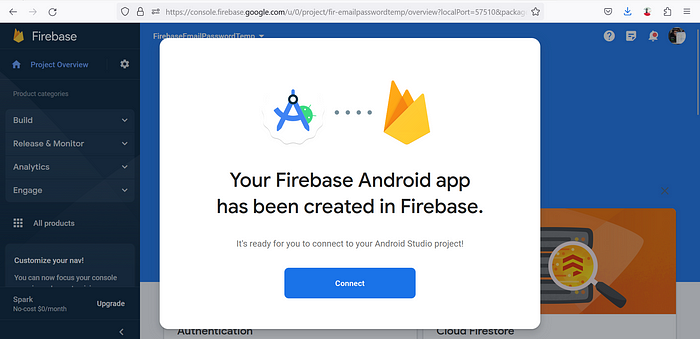
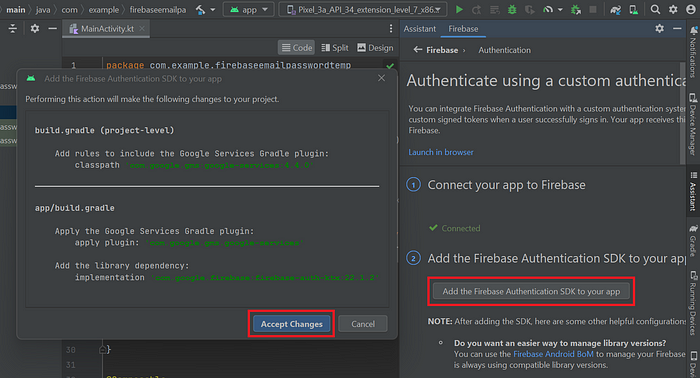
Now return to Android Studio for the final step in Firebase Assistant. Click on the Add the Firebase Authentication SDK to your app button and Accept Changes then wait for Gradle to sync.
Step 3: Enable Email/Password Authentication Method
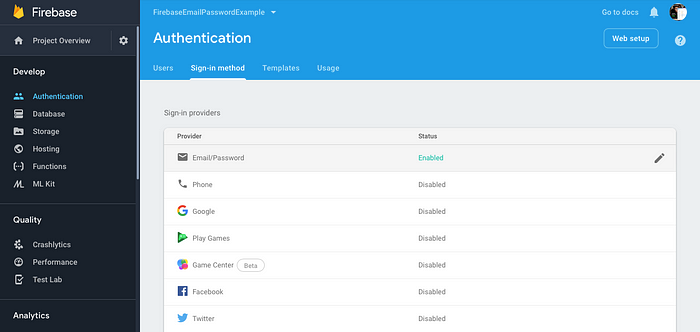
Next, head to the Firebase console (http://console.firebase.google.com/), navigate to the project you connected your new app to, and under the Authentication tab, enable Email/Password authentication.
Step 4: Implementing Login and Registration Code in Your App
Now you are ready to start coding. The first thing to consider is including Internet permission request in your Manifest file:
Next, let's code our registration activity. This includes the layout XML file with our views and the Java class with the working code.
Now that you are all done with the user registration feature, it's time to code the user login activity. Below is the code for the layout XML file and the Java class.
And there you have it. A working email/password user registration and login activity for your Android app. If you are wondering where your data is stored, the answer is on Firebase. You can find all registered users in the Firebase console.
The link to the complete code for this tutorial can be found in this repo on Github: https://github.com/buildbro/FirebaseEmailPasswordExample
Optional Step: Implementing Login and User Registration Code in Jetpack Compose
For this example, we are using androidx.navigation:navigation-compose library to handle navigation. Ensure to add it to your app-level gradle file.
Before we get started, modify the content of your MainActivity.kt to the following:
private lateinit var auth: FirebaseAuth
override fun onCreate(savedInstanceState: Bundle?) {
    auth = Firebase.auth
    super.onCreate(savedInstanceState)
    setContent {
        FirebaseEmailPasswordExampleKtTheme {
            var navController = rememberNavController()
            NavHost(navController = navController, startDestination = "login_screen") {
                composable("login_screen") {
                    LoginScreen(navController, auth)
                }
                composable("signup_screen") {
                    SignupScreen(navController, auth)
                }
                composable("home_screen") {
                    HomeScreen(auth)
                }
            }
        }
    }
}
Next, implement the composables for LoginScreen, SignupScreen and HomeScreen by adding the following code to the end of MainActivity.kt:
@OptIn(ExperimentalMaterial3Api::class)
@Composable
fun LoginScreen(navController: NavController, auth: FirebaseAuth) {

    var emailText by remember {
        mutableStateOf("")
    }
    var passordText by remember {
        mutableStateOf("")
    }

    Column(
        modifier = Modifier
            .fillMaxSize()
            .padding(16.dp)
    ) {
        Text(text = "Firebase Auth Example App")
        Text(text = "Please login or register a new account to continue...")
        Box(modifier = Modifier.height(8.dp))
        Text(text = "Email:")
        OutlinedTextField(
            value = emailText.toString(),
            onValueChange = {
            text->
                emailText = text

            },
            modifier = Modifier.fillMaxWidth()
        )
        Box(modifier = Modifier.height(8.dp))
        Text(text = "Password")
        OutlinedTextField(
            value = passordText.toString(),
            onValueChange = {
            text->
                passordText = text
            },
            modifier = Modifier.fillMaxWidth()
        )
        Box(modifier = Modifier.height(8.dp))
        Button(
            onClick = {
                auth.signInWithEmailAndPassword(emailText, passordText)
                    .addOnCompleteListener {
                            task->
                        if (task.isSuccessful) {
                            // TODO Show toast that login was successful
                            navController.navigate("home_screen")
                        }
                    }
            },
            modifier = Modifier.fillMaxWidth()
        ) {
            Text(text = "Login")
        }
        Row {
            Text(text = "New user?", modifier = Modifier.padding(12.dp))
            TextButton(onClick = {
                navController.navigate("signup_screen")
            }) {
                Text(text = "SignUp")
            }
        }
    }
}

@OptIn(ExperimentalMaterial3Api::class)
@Composable
fun SignupScreen(navController: NavController, auth: FirebaseAuth) {

    var emailText by remember {
        mutableStateOf("")
    }
    var passordText by remember {
        mutableStateOf("")
    }
    Column(
        modifier = Modifier
            .fillMaxSize()
            .padding(16.dp)
    ) {
        Text(text = "Firebase Auth Example App")
        Text(text = "Please login or register a new account to continue...")
        Box(modifier = Modifier.height(8.dp))
        Text(text = "Email:")
        OutlinedTextField(
            value = emailText.toString(),
            onValueChange = {
            text->
                emailText = text
            },
            modifier = Modifier.fillMaxWidth()
        )
        Box(modifier = Modifier.height(8.dp))
        Text(text = "Password")
        OutlinedTextField(
            value = passordText.toString(),
            onValueChange = {
            text->
                passordText = text
            },
            modifier = Modifier.fillMaxWidth()
        )
        Box(modifier = Modifier.height(8.dp))
        Text(text = "Repeat Password")
        OutlinedTextField(
            value = "",
            onValueChange = {

            },
            modifier = Modifier.fillMaxWidth()
        )
        Box(modifier = Modifier.height(8.dp))
        Button(
            onClick = {
                auth.createUserWithEmailAndPassword(emailText, passordText)
                    .addOnCompleteListener {
                        task->
                            if (task.isSuccessful) {
                                //TODO add toast to show registration was successful
                                navController.navigate("login_screen")
                            }


                    }
            },
            modifier = Modifier.fillMaxWidth()
        ) {
            Text(text = "SignUp")
        }

        TextButton(onClick = {
            navController.navigate("login_screen")
        }) {
            Text(text = "Back to Login")
        }
    }
}

@Composable
fun HomeScreen(auth: FirebaseAuth) {
    Column(
        modifier = Modifier
            .fillMaxSize()
            .padding(16.dp)
    ) {
        Text(text = "Hello")
        Text(text = auth.currentUser?.email!!)
    }
}
You can find the complete code for the Jetpact Compose example here.
Thank you for reading and don’t forget to clap for me if you found this post helpful :)

📝 Read this story later in Journal.
🗞 Wake up every Sunday morning to the week’s most noteworthy Tech stories, opinions, and news waiting in your inbox: Get the noteworthy newsletter >